AI travel poster prompts are going viral — and honestly, I get why. My friend sent me a photo last week.
So my friend sent me a photo last week. It was her face, but mountains were literally coming out of her head. Pine trees, misty roads, a river, clouds — all blending into her portrait like a movie poster. I genuinely thought she paid someone to design it.
Turns out she used an AI prompt. Uploaded her photo, wrote a long description, and the result was ready in five minutes. I put down whatever I was doing and tried it myself. Spent my entire Sunday on it. And honestly, no regrets.
What Even Is This — Let Me Explain Simply
Double exposure is a photography technique where two images get layered into one. You take a portrait — someone’s face — and blend a whole landscape inside the silhouette. It looks like forests or mountains are growing out of the person. Photographers used to do this with film cameras. Took real skill and time.
Now AI tools do it in minutes. ChatGPT, Gemini, Midjourney — you upload your photo, write a detailed prompt describing the location and style, and the AI generates the whole thing. The ones going viral right now are travel-themed. Rishikesh mountains, Meghalaya waterfalls, misty Himalayan roads. They look like actual luxury tourism posters. Some of them are genuinely beautiful.
And the best part — you do not need any design skills. Just a good photo and the right prompt.
The Exact Prompts — One For Each Location
Here is the thing nobody tells you. The final result depends almost entirely on how you write the prompt. Too short and the AI makes something generic. Too complicated and it gets confused, ignoring half the details you wrote.
I tried a bunch of versions before landing on these two. One for Rishikesh, one for Meghalaya. Copy them exactly and paste directly into ChatGPT or Gemini after uploading your photo.
RishikeshUttarakhand — The Mountain Soul Poster
Create a cinematic double-exposure travel poster for “Rishikesh, Uttarakhand” using my uploaded photo.
Keep the same face, pose, outfit, and natural features unchanged.
Blend Himalayan valleys, pine forests, misty mountains, winding roads, rivers, and clouds inside the portrait silhouette.
Add a small full-body version beside a bike on a mountain road.
Style: luxury Himalayan tourism campaign, dreamy matte tones, soft fog, atmospheric depth, realistic blending, minimal typography, clean white background, ultra-realistic editorial aesthetic.
Text:
“Rishikesh”
“Uttarakhand”
“TRAVEL • BREATHE • ESCAPE”
Do not change face.
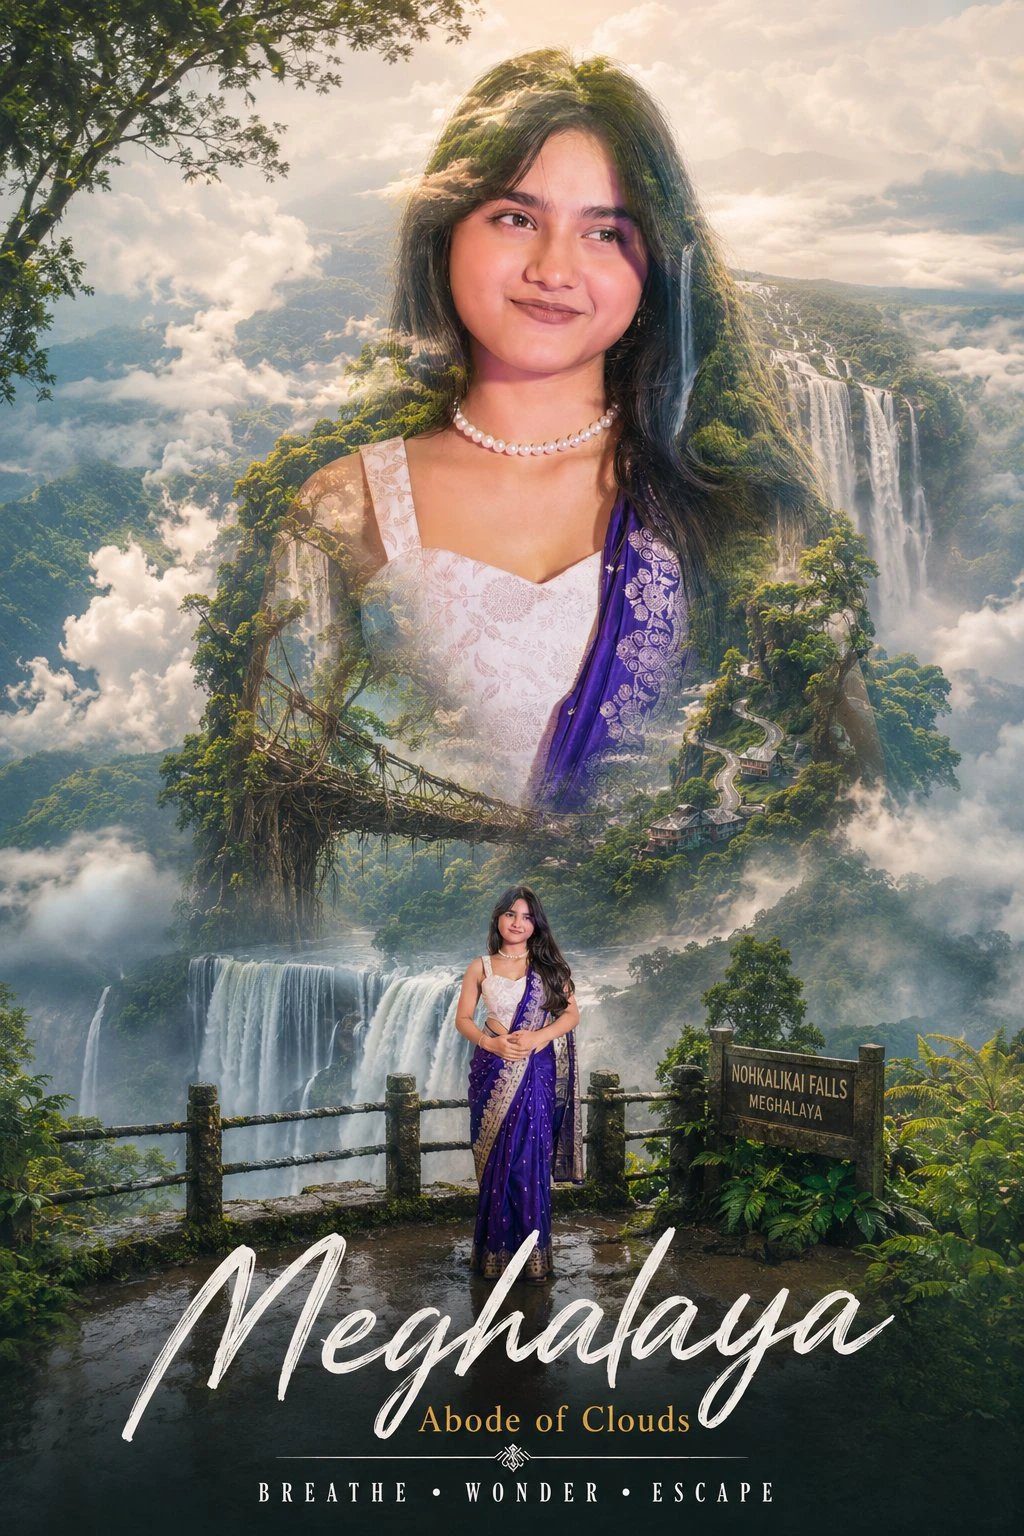
Create a cinematic double-exposure travel poster for “Meghalaya, India” using my uploaded photo.
Keep the same face, pose, outfit, hairstyle, expression, and natural facial features completely unchanged.
Blend giant waterfalls, living root bridges, dense rainforests, misty valleys, dramatic clouds, winding roads, and lush hills inside the portrait silhouette.
Add a small full-body version standing near a waterfall viewpoint.
Replace the plain white background with soft cloud layers, distant green mountains, rainforest textures, waterfall mist, and atmospheric fog extending naturally beyond the portrait.
Style: luxury eco-tourism advertisement, cinematic nature photography, dreamy matte colors, realistic blending, ultra-detailed, premium editorial poster design.
Text:
“Meghalaya”
“Abode of Clouds”
“BREATHE • WONDER • ESCAPE”
living root bridgeswaterfall mistrainforest depthcloud backgroundeco-tourismgreen matte
One thing I keep saying — write “do not change face” somewhere in the prompt. I forgot it the first time. The AI built a beautiful poster but the face in it was some random person. Not me at all. Lesson learned the annoying way.
Things I Wish I Knew Before Trying This
I got bad results a few times before figuring out what actually works. Sharing the real stuff here, not the generic tips you find everywhere.
Your starting photo matters more than anything
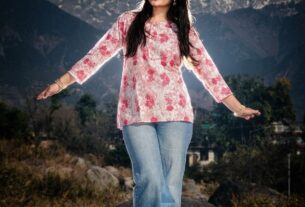
A clear, well-lit portrait gives the AI something solid to work with. Dark photos, blurry selfies, or shots where half your face is cut off — those almost never turn out well. You do not need a professional camera. A good phone photo near a window with natural light is honestly enough.
Write feelings, not just place names
Typing “mountains and trees” gives you a boring result. But writing “misty Himalayan valleys at golden hour, soft fog rolling between pine trees, atmospheric depth” changes everything. The AI picks up on mood and texture words way more than just location names. This surprised me a lot when I first noticed it.
Add “matte tones” or “dreamy” every single time
Without these words, the output looks over-sharp and over-saturated — like a random phone wallpaper from 2015. Matte and dreamy push the image into that soft, editorial, travel-poster territory. The difference between including and skipping these two words is genuinely huge.
Run it at least three times before giving up
The same exact prompt gives a different image every single time. First attempt might be average. Second could be better. Third one sometimes looks completely different and way more polished. I always generate at least three versions and pick the best one. Do not quit after one try.
How To Actually Do This — Step By Step
The process is simple. Once you do it once, it takes ten minutes max. Here is exactly what to do.
01
Pick a tool
ChatGPT with GPT-4o or Gemini Advanced. Both support image upload and image generation right now.
02
Upload your photo
A clear portrait shot. Face and shoulders is fine. Good lighting is the only real requirement.
03
Paste the prompt
Copy from above and paste it directly. Do not change anything on your first try — just see what comes out.
04
Check the result
Is the face yours? If not, add “keep facial features exactly as in the uploaded photo” and generate again.
That really is the whole process. What you want in the final output — your recognizable face, the landscape blending smoothly inside the silhouette, and the poster text sitting clean at the bottom. Not every generation nails all three. But when it does come together, it genuinely looks like something you would frame and hang on a wall.
Also — do Rishikesh and Meghalaya in separate chat sessions. I tried both in the same conversation and the AI kept mixing up which location to use. Separate sessions, same photo, one prompt each. That way works cleanly every time.
What I Actually Think About All This
“
I did not expect to enjoy this as much as I did. Photo editing was never really my thing. But when the Meghalaya poster came out right — my face, the waterfalls, the clouds, all sitting together in one clean image — I genuinely stopped for a second. It looked real. Like something pulled out of a travel magazine.
That poster is my phone wallpaper now. Every time I see it, I feel like booking a ticket. Maybe that is the whole point of it. AI made something that actually feels personal. Not generic. Not cold. Just yours.
📌
Next You Can Try
Use this same double-exposure technique for other Indian locations — Spiti Valley, Coorg, Andaman, Varanasi ghats. Every place has its own visual personality. Each one gives a completely different feel in poster form.
🤖 AI Prompt — Copy Karo & Use Karo
Neeche prompt copy karo → ChatGPT ya Gemini mein photo ke saath paste karo!